DIY Faux Leather Bi-color Tote Bag – Sewing Tutorial
Today’s , well, couple of weeks ago actually, DIY is a hand sewn faux leather tote bag that is greatly inspired by Celine’s bi-color Cabas tote bag. It was a request , so I tried to make it as true to the photo as possible. I can never replicate exactly, but this bag can teach us much, like how the seams runs on the side corners of the bag and how the bottom is boxed like a paper bag. My very handmade version looks like this :
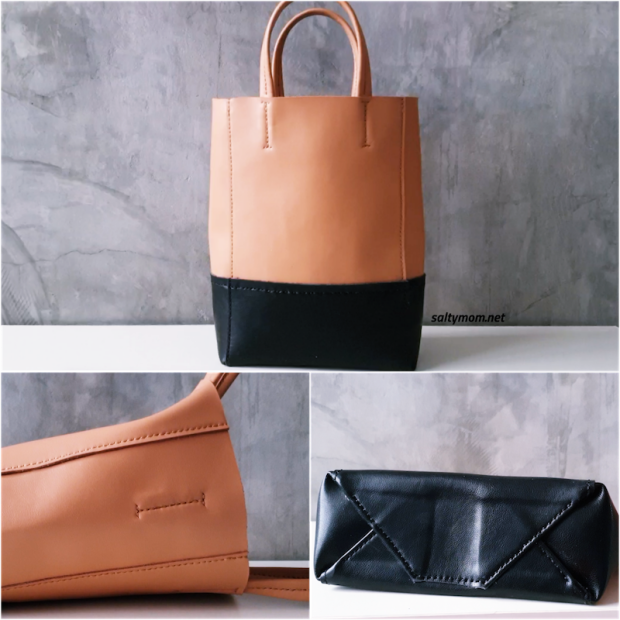
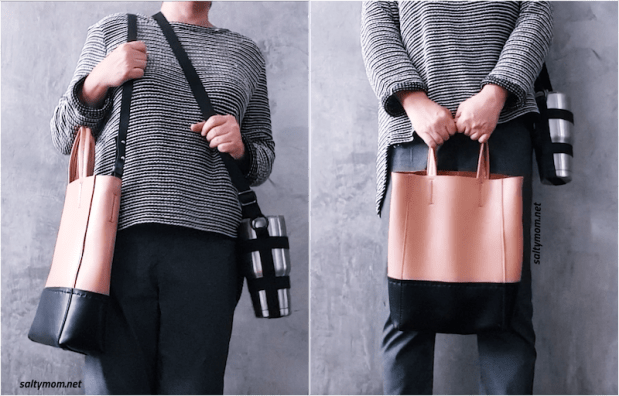
It has an adjustable leather strap that can be detached completely off the bag , and also a pocket large enough to fit a cellphone , maybe a small wallet :
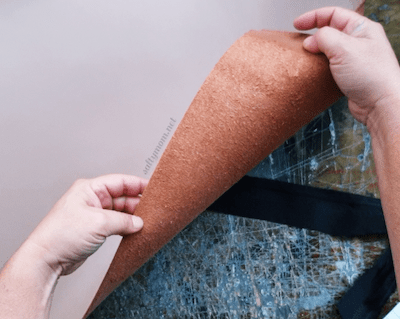
The faux leather I got is 2 mm thick, with a very soft touch but still when sewn together can stand up straight. The back of the pleather looks very much like real leather :
I hand sew the whole bag ( after failing to attach the bottom to the top with my sewing machine ). I think I cover most of the tips in this sewing video :
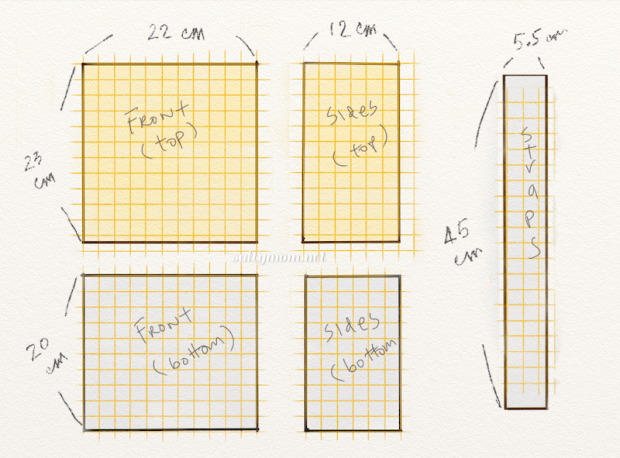
The pattern is here :
The stitches used are the back stitch and the saddle stitch. If you really want a polish result , use saddle stitches for the whole bag.
To make this bag, you will need leather tools. Here are what I found on Amazon, similar to what I use. They are affiliate links which means if you purchase anything from those links, I will get a small reward with no extra cost to you. Thank you very much !!
- Pricking Iron : I got mine as a set, you will need the ones that punches multiple holes ( 4 above ) and one that just do 2 holes. This will help you get uniform stitchings.
- Rubber Mallet and cutting mat : These should be use to protect your pricking iron from damages. The cutting mat is not totally necessary, you can also use old magazines instead.
- An Awl will help greatly in the hand sewing process. Sometimes you punch holes thru multiple layers, and going thru the the hole with an awl first , will make the sewing needles pass thru easily.
- I use 2 blunt Cross Stitch needles and 0.8 mm waxed threads for this project. I already have those needles , and it is safer for you fingers if you are new to leather sewing. A spool of waxed thread is more than enough. You need 5x the length of what you will be sewing.
- Contact glue : This is a must. Actually I cheated and didn’t wait for the glue to cure completely. Once this glue dries and you put the two pieces together, they will be stuck forever !! That’s why in the video, you see the glue is just tacky, I needed that few seconds to reposition if I make a mistake.
- Stitching Groover : Not necessary, but a fun tool to use. They help make an uniform line for you to follow with the pricking iron. You can always use masking tape to form a line.


hiii, love the tutorial! I wanna make it but i have a good question. What ends up to be the real size of the bag? Can i put an a4, a notebook? Greetings from argentina
Pingback: 30 Faux Leather Handbags You Can Sew: Stylish DIY Patterns for Every Occasion – Sewing
Pingback: Motifs de bricolage élégants pour chaque event – couture – ETHAN PIKE