DIY Thai Fisherman Pants with Free Pattern Download !
After making the wrap skirt, I was thinking about what other clothing I can make where I can just tie it around my waist. The Thai Fisherman pants ! The ultimate one size fits all , roomy and comfy. I studied my husband’s pair and after several days of hair-tearing pattern testings , I made this baby :
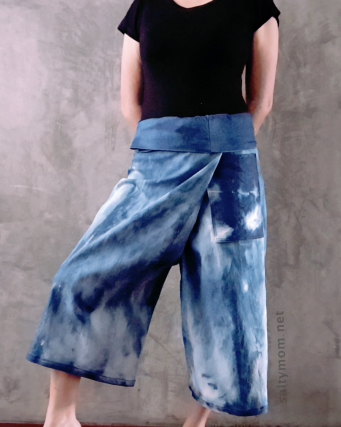
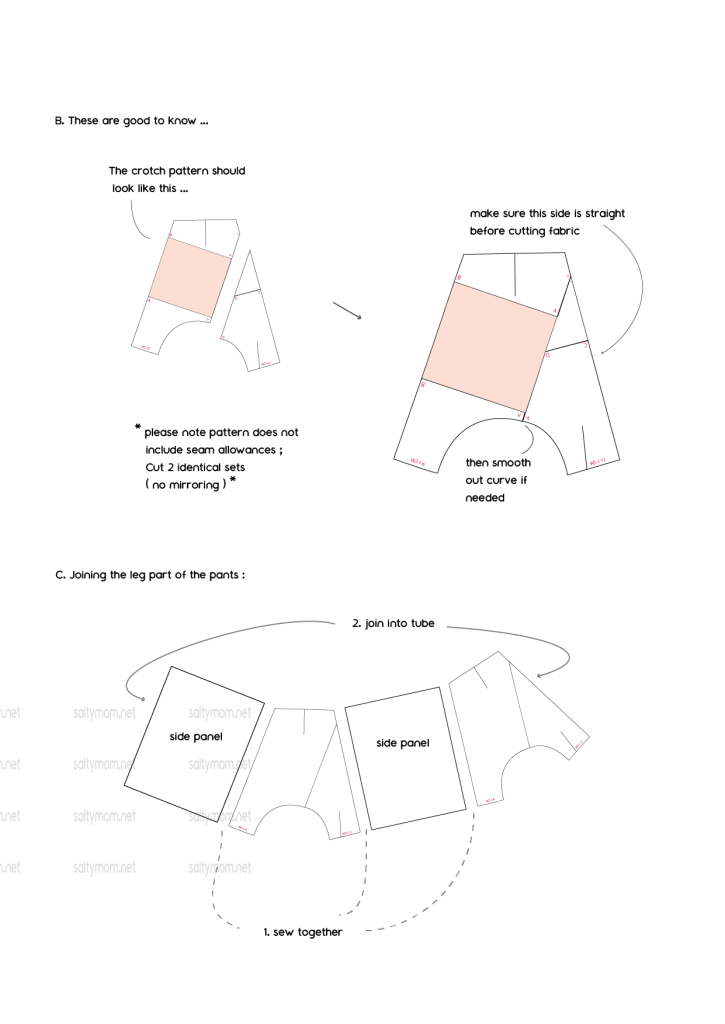
… in 10 oz stretch denim , and spray bleached sadistically as an afterthought. The pants’ made up of rectangles ( waist band and side of legs ). The middle panel or the crotch area is dropped, providing a maximum comfort zone. Here’s what the crotch area looks like :
Update : The crotch piece is cut out identical ( not mirrored ). So sorry if I confused any of you. Each leg piece will make up of the side panel + the 9.1 cm pc + 11.1 cm pc.
These pants are huge. I used about 3 meters of denim ( from the wider width rolls , whatchamacallit ? The wider than normal size fabric rolls) :

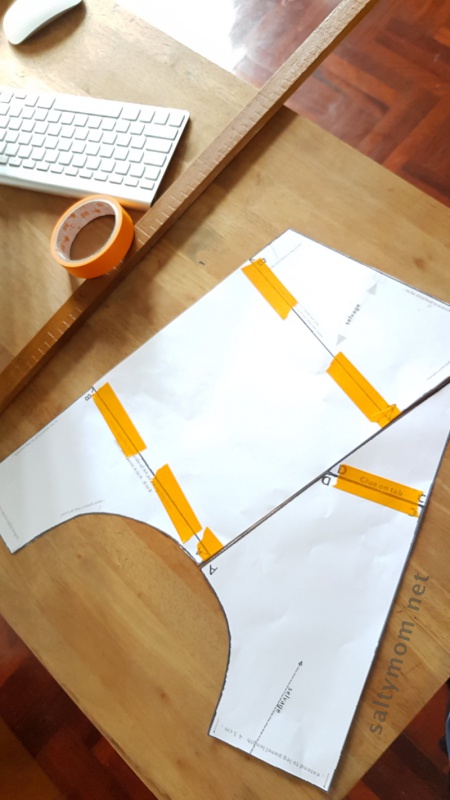
The patterns are in pdf ( A4 paper size ), links below.
- Thai fisherman pants pattern wide crotch1
- Thai fisherman pants pattern wide crotch2
- Thai fisherman pants pattern pointy area
Each pattern has a line coded with the actual measurement in red. In my case, when I test printed it out in pdf form, I have to scale the size to 106% ( no borders ) to get the actual measurements.
I designed this pattern to save you printing paper 🙂 All you need is to print out 3 sheets of pattern. Then watch my tutorial on how to assemble the pattern ! I hate it when I have to print a pattern and gets 10 sheets of paper with only 2 lines on it ? Does that irk you too ?
In the tutorial, I made a shorts version which is great for wearing at home or as pyjama pants. The fabric is made by Cotton and Steel and it have little teal fishes on it , ha ! :

But don’t worry, towards the end I will show you how to extend the leg line. I hope you will have fun sewing up this fisherman pants. Please share with me if you make one !
*update : I’m so happy to see people making these pants. I’ve been tagged on Instagram by someone in Korea who made this pants twice 🙂 There’s also one from Petit Main Sauvage which came out really cool. So, don’t be afraid of this pattern. Just go step by step and you will get there 🙂
*more updates : I made some additional notes , they should be helpful :


Very clever!
Thank you, wscottling !
Hey! Can you make a written instruction because I have a little trouble following the video… I love the design, though, and I really want to make my own pair. Thanksss 🙂
hi there, Vanessa 🙂 thanks for watching my tutorial ! can you tell me which part did you got stuck at ?
Oh, you know what I kinda get the video now… 🙂 But how much cloth do you think I should buy? and how long is the waist wrap?
lol , now that I rewatched it, I must be high on caffeine when I edited the video ! For the shorts version about 2.5 yards ( 44″ width fabric ) . The denim version I use 3 meters, but the denim comes in extra wide width. I think it’s those 60″ wide fabric. The waist wrap is 73.5 x 34 cm, have to add 1 cm all around for seam allowance. My waist tie is 120 cm long, but it’s better to tie something around your waist n measure that instead . Hope this helps, Vanessa ! and if you get stuck anywhere , just ask !
Hi there , Aparna 🙂
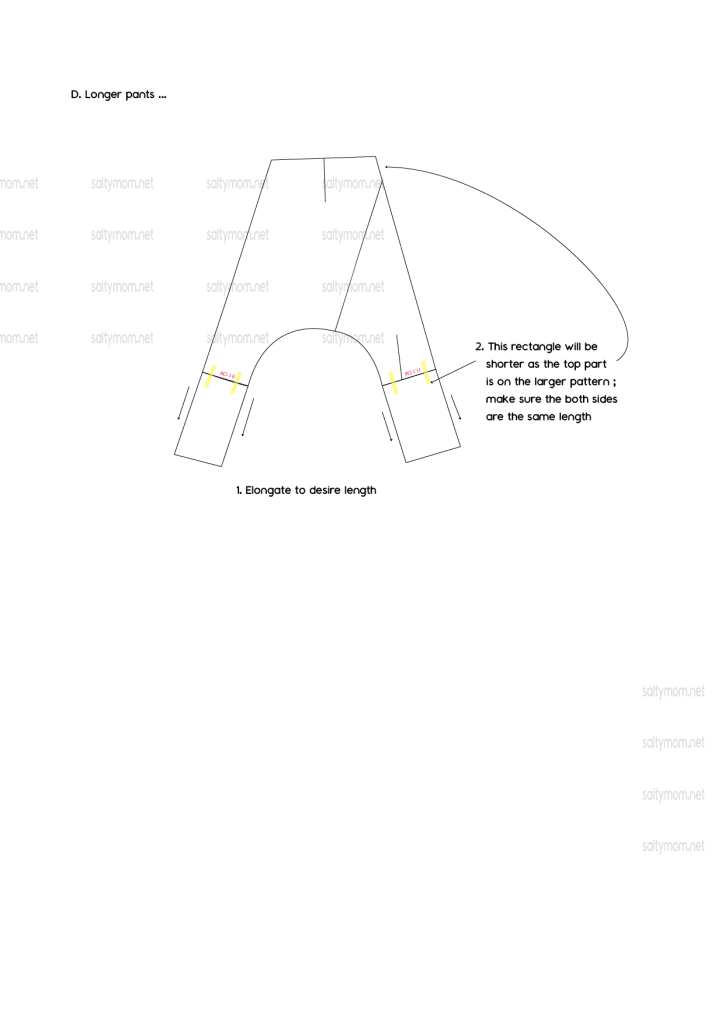
So the crotch area is made of 2 pieces , a bigger piece and a smaller one. Suppose your new length is 100 cm, you make a rectangle by subtracting the bigger piece’s long side from 100 cm. The width remains the same. Then tape this rectangle to extend the length.
For the smaller piece, you take that same number you got from subtracting and further subtract the short side of the bigger piece to make a new rectangle. ( the short side will be where I pointed to in the video at 3:20 )
Hope this helps n thanks for watching !
Hi,
I love your pattern, however I’m little confused. On the video, there is part of middle panel and side leg panel. Could you please help for the measurement? Many thanks 😊😊
hi opie, thanks for asking! i was thinking about an easier way to adjust the leng
oops 🙂 i was thinking about an easier way to lengthen the pants n i think i got it.
so 1. you just assemble the pattern to get the middle panel in one whole piece.
2. Increase the length ( by extending both the leg area on the middle panel ). You’ll get two rectangle pieces, one for each leg.
3. Tape them onto the middle panel and measure the sides.
4. The side panel ‘s length will be the same as the middle panel’s side.
5 Then cut the middle panel to get 2 pieces, for cutting out the fabric.
hope this makes sense 🙂
Pingback: DIY a Summer Dress and Bias Binding Tutorial | Salty*mom
Hi, is it possible to make each leg section in 1 piece instead of sewing together 3 pieces to make each leg? I like to sew completely by hand and this would save me a lot of work.
Thanks for your great work, Frani
That’s very interesting, Frani ! Maybe you can cut separate pieces for the left n right side of the pant legs .The seams will be at the center of the pants, so it’ll still give out that Thai fisherman look. If you try it, please share how it turn out.
Hi!, thanks for getting back to me so quickly. I would guess that the original pattern was made with a 3 piece leg to save fabric or match up fabric. I made a pattern from an old pair of Thai fisherman pants that my son brought back from Thailand at least 15 years ago. My results were not fabulous i must admit. That what made me think of making each leg out of 1 piece instead of 3. Less room for errors.
I will let u know if I give it a try.
Thanks, frani
Thanks for sharing, Frani ! The pattern gets me wondering too. In the past, traditional clothing were rectangular pieces of fabric that’s worn by pleating ,wrapping, tying around the body. Pants would be worn by pleating the ends of the fabric till it reaches the waist’s center, then tucking the lower ends between the legs and securing it at the back. It could be possible when they want to make an easy-to-wear version, all the seams will naturally be designed in the center. The saving / matching fabric is very possible too ! Whoever thought this up created an unique pattern. When you see this style , you know it is the Thai Fisherman pants 🙂
love, saltymom 🙂
Thank you for stopping by my blog and clicking Like. Your DIY Projects are great. Be Blessed, Mtetar
no problem Mtetar, my way of spreading diy ❤️❤️❤️ to fellow makers !
Thanks, keep up the great sharing, Mtetar
Hello, Love your fisherman pants but for the life of my I do not see the download. Please advise. Thanks
That’s strange , the links r working. Maybe they went directly to your download folder?
Hi, please could you make a written step by step on how to make these trousers? I am making them fir an exam so it would be really helpful. Thank you 🙂
awesome pants…really want to make some soon!
That would be so cool ! Thank you!
The piece of the crotch area…is sewn the same in both sides right? Front andof back…and then while assemblig all together they go facing the same way ? I dont know if I explain myself
LoL, I am trying to remember what i did. I think you are referring to the triangle shape on the crotch area? If you fold the fabric and cut out the pattern, you will get a mirrored pattern. After you sew it into a tube and add the waistband, you can put it on and choose which side to be the front.
I know it’s 2 years that you’ve asked , but i realized I gave you the wrong answer. The crotch part is cut identical, not mirrored. I’m so sorry , please don’t kill me.
Hi there I came across your pattern whilst searching for fisherman pants patterns. I was wondering how large a waist/hip could fit into your current pattern and if I needed to size up how would I best go about that?
New to sewing. Love fisherman pants & can’t wait to try the pattern out.
any chance for a text explanation.
I found the video very hard to follow because dimensions are up only for an instant & its not very clear which parts are which.
Hi – thank you so much for the pattern… but I can’t understand the final crotch area piece…
It comes out that the area you extend for the legs, one side is 9.1cm and the other side is 11.1, unless I have done something wrong. Why would it be like that?? If you have the crotch sewn together as a mirror image, then one side is way skinnier, if you have it sewn short side to long side, then it comes out off centre on both sides… is that to allow for the pulling of the wrap to one side? I can’t see from your video, it’s so fast, and I can’t see a clear view of the finished pant, lying on the table, both back and front , to be able to work it out myself… maybe I’ll do a doll’s version, but I can’t see how it comes out symmetrical, at all – I’m too brain fogged from menopause to work it out, lol.
I hope I’m being clear, thanks if anyone can help!
Hi Jan, thanks for asking ! For each leg, there will be the long side panel + the 9.1 crotch piece + 11.1 crotch piece, so both legs will end up with the same width. That means, the pattern have to be cut not mirrored but identical . Arghh, I gave someone the wrong answer ! I’ll go add it in the instructions, be back in a moment …
Haha…. thanks so much! I ended up re-creating the crotch piece, by folding it down the centre line, and cutting between the two widths to average it – just because I’ll never make the shorter length and it’s easier to have the paper pattern to slap down… so my piece ends up being cut on the fold. I did the same with the leg pieces, as I’m a size 18/20 in Australia, and had to taper from the larger waist, to avoid having an entire marquee flapping around my legs… so it ended up being a kind of franken-pattern, as I had to drop the crotch to accommodate booty and stomach, plus add to the hemline as I wanted long pants, and add to the waistband, etc etc.
But it was so much easier to start from your pattern – thank you so much! Can’t wait to try your dropped crotch pants, as well… so good!
I’m so glad you figured it out and that Franken process, so intense 🙂 Thanks again for your comment !
Hello,
I have one question about the pattern.you just show two Or three measurements On the pattern.how do I figure out the rest of the measurements for the rectangle pattern width and length?please if you can explain it to me. I will be really appreciate . Thank you 😊
Hey Beant, the measurements for the waistband and the side leg panels are in the video. The width of the pants are the same for both the long and short version. In case you want to make one in a different width, you can start with the waistband. Figure out the circumference of the waistband, subtract the 2 crotch measurements ( the top part of the crotch pattern where it will be attached to the waistband .) The remaining measurement will be the side panels, so just divide that by 2 to get the width of the side panels. For the length, please refer to the additional notes . Hope this helps 🙂
This is an amazing pattern. I can’t imagine how you worked it all out but it makes a great pair of fishpants. I see some folks have trouble with the video … my strategy was to click on the settings and slow the speed of the video to a quarter, 0.25 . This also made the music very soothing and ethereal. 🙂 Just wanted to say thanks, really. All the best.
Thank you so much Josephine !
Pingback: Ninja Costume DIY – Cry Baby, Cry
Hello. I have been reviewing this pattern and guide plus your youtube video. Your pattern has each crotch area made up of two separately cut pieces of fabric, that are then sewn together with the seam then top-stitched. I have seen other patterns for fisherman pants online, where they have a simpler pattern of two big t-shaped pieces of fabric. When sewn on the sides these big T shapes form the legs and the crotch, with one straight crotch seam. What is the advantage of your style? I am thinking your design hangs better as pieces are cut on the weave, and your design puts the seams in better places for the folds you do when wearing the pants. Does your style use more fabric or waste more fabric than the other style?
Also how do you finish the seams? Can you do French seams, or do you just zigzag / overlock the seam edges before joining the pieces?
“The crotch part is cut identical, not mirrored.” Does this mean you lay the crotch parts of the pattern on the fabric with the fabric right side up, and cut all those pieces that way, and that you do not fold the fabric and cut them out together with two fabric layers folded?
I think I will make my pants using your style but just want to understand it properly before cutting my fabric 🙂
Many thanks.
Hey Robert, thanks for your comment ! Yes, the crotch patterns are cut without folding the fabric, cut 2 sets with the fabric facing the same direction. For the seams, I did the regular zigzag, but French seams will be a neat way to finish it 🙂
The diagonal seams does make the fold stay in place and the smaller patterns make use of the fabric scraps. The way the crotch area is constructed is unique to this style of pants, just like when we see a kimono top , we recognize it by the wide sleeves and thick neck band.
Have fun sewing this fisherman pants !
Thanks so much for this info and your cool guide and patterns 🙂 I hope to make some soon.
Thanks for the video, is it possible to edit and add the measurements so we can have a good idea because not all of us has a printer. Please with a cherry on the top.
Thank you so much for this pattern. I did get help from someone who could understand this pattern better but once i started sewing the pieces, it made sense and I loved the product. Loved the french seam idea, pants look so good. Absolutely love this!!
Thank you 🙂 I am so glad you like it !
Pingback: DIY Thai Fisherman Pants with Free Pattern Download ! – Your Ideas Matter
Has anyone seen the fisherman pants with vecro keeping them up around waist ? Would love that pattern
Dear Salty*Mom, I think we may be related. The answer to your question about usual pdf patterns and printing is YES!!!!! I think I ran across your/this pattern another day (recently) ’cause what else would prompt me togo hunting for Thaifisherman pants shorts? So here I am, day in the 90s again with humidity oozing itself and I am going to sew. By hand. I’ll let you know what happens. And soon I am going to crawl through your site looking for more goodies. Many many thanks. OneBirdieMa
Hi there
I’m from South Africa and am absolutely in love with your patterns, the problem is I can’t find the links to download them. could you please direct me or assist in some way.
Anusia
Hi thanks for postinng this
I don’t understand why you have the grainline arrows going in different directions, and why it says selvage on the arrows. Can you clarify what the arrows indicate? Do you mean the selvedges are at either end of the arrows? Because I thought that on patterns, the grainline arrows go with the grain…the length and not across the width. Are parts of this cut on the bias?
You can paste the center piece together and redraw the grain line so it is perpendicular to the waist. I was trying to get the fish pattern to line up so they all swim in the same direction. There wasn’t much effect on the drape as the center was folded inside.
hi, what size in cm are the sides (width)please?
I am finding this tricky as some things are written in cm & some in inches..
thank you so much!!
lisen
I really liked it and I’m trying to make it. What will be the width of the side panels?
The width is 49 cm + seam allowances. ( if your seam allowance is 1 cm, then cut 51 cm ) Hope this helps 🙂