DIY : The Crochet Food Cover that Turned into a Wooden Frame.
I have this idea to use up all those mini granny squares to make a food cover. It’ll be so pretty, so Scandinavian design. The plan was to join all the granny squares into a boxy lid shape that looks something like this :

Image from Apartment Therapy, from an Etsy shop “Wood and Wool Stools “
Then build a rectangular frame with wood. Nail on some legs. It’s 1-2-3, how easy is that, huh ?
Hmmpphh.
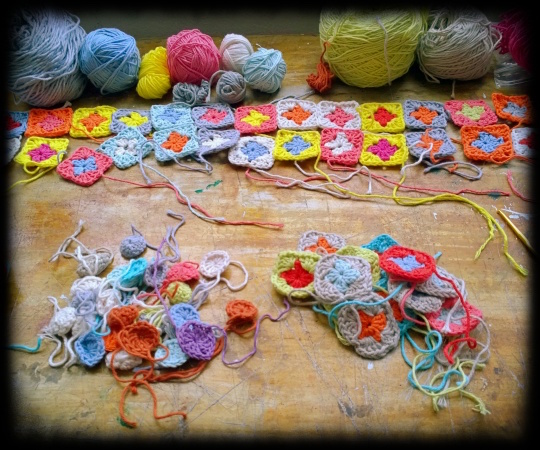
Found out I didn’t have enough squares for the food cover. Intense hooking session commence. Total squares for project =172
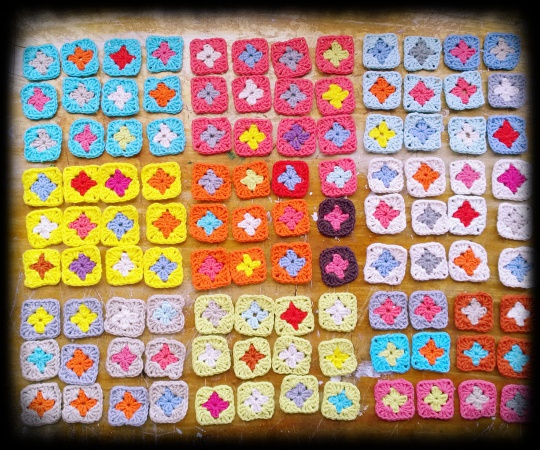
What is the best color configuration ???
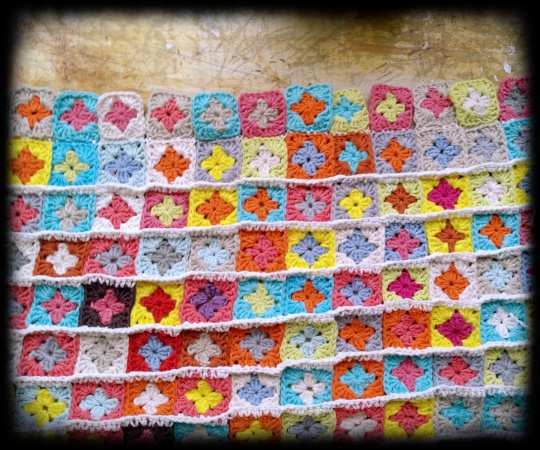
Started joining the granny squares with single crochet stitches showing on the front …
Too much white stealing the show !! Decided to do the single-crochet joining on the back. Unravel every roll and start over.

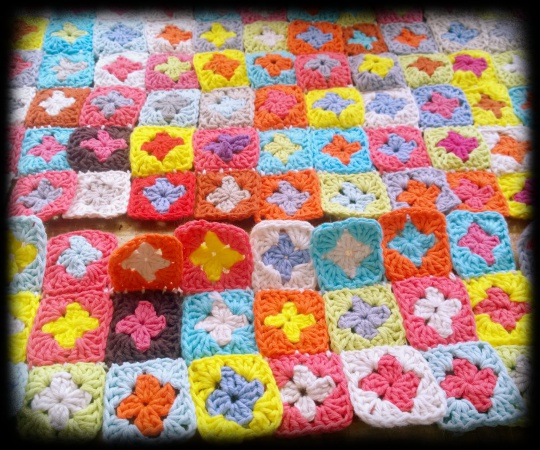
Fruition at last !! At last !!
Next I went on to make the wooden frame… with no carpentry skills whatsoever. Just lots of experience watching HomeMadeModern and Steve Ramsey on Youtube.
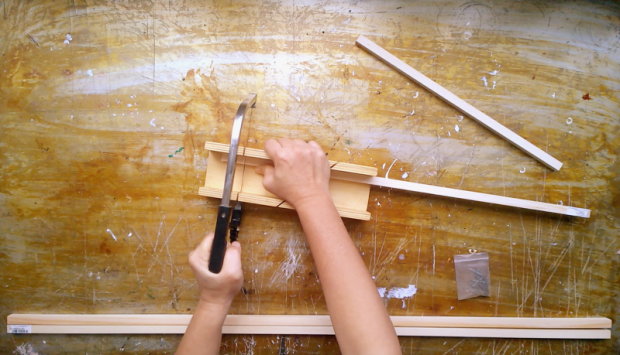
Started sawing. No problem ; all digits intact.
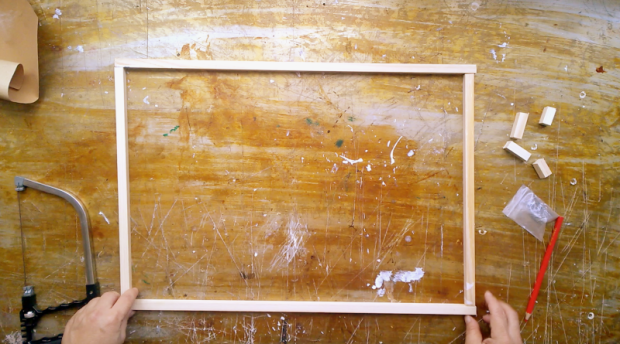
thought that I could just drive some nails to join the blunt ends. This part didn’t work, the frame was twisting in all directions with the slightest pressure.
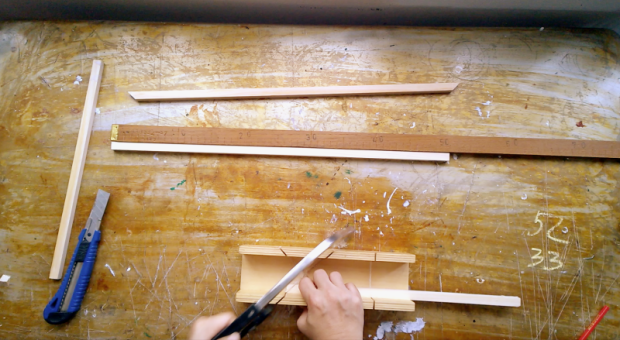
took everything apart, started to saw some miter corners. Because Google said so.
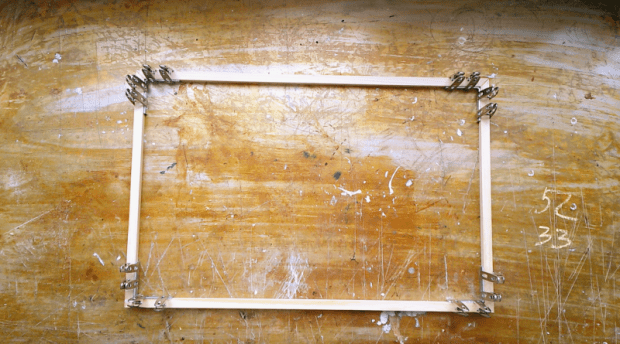
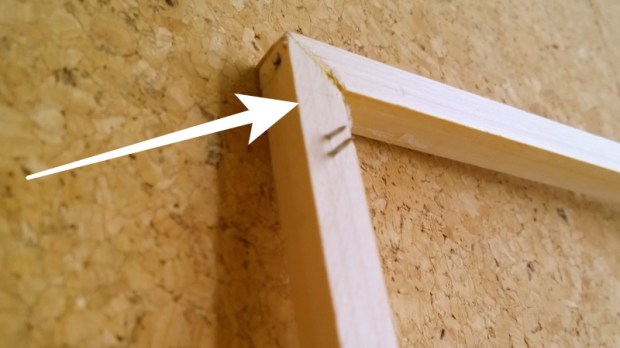
Glued corners together and drove nails into them. Later, added an additional vertical piece to the centre of the frame.
*no photos* The frame came out quite sturdy. However, I realised that I can’t add the legs to the corners because there are already 2 nails intersecting the corners. I nailed the legs next to the corners. I had a very bad feeling.
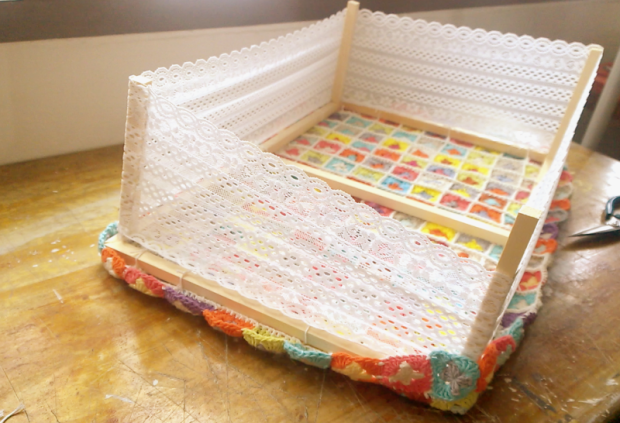
I went on with it anyways, tying down the granny squares to the frame. But I just can’t leave the sides open. Food cover, not a canopy for bugs to party under. Added the lace, then the legs start w o b b l i n g .
Come to think of it, I should have nailed the legs to the inside corners of the frame. Too late, already pulled off all the legs. No possible way of extracting the nails. Why is the arrow not pointing to the nails ??
It looks quite dangerous with the nails poking out so I stuck the whole frame onto the cork board… and hey, it looks kinda cool.

In the future, I can use it to pin to-do lists , receipts, photos and kinda contain them so my cork board won’t look messy. The letters are made from plaster of paris with the DIY here. To make some of the letters stand up straight, just dab some silicon glue on the bottom. Silicon glue won’t damage the wooden frame. When you want to change out the words, you can just peel them off.
Hope you enjoy this crazy, long post !


Pingback: DIY : Granny Squares Crochet Bag with Lining | Salty*mom