DIY Messenger Bag ( part 1.2 on Zippers )
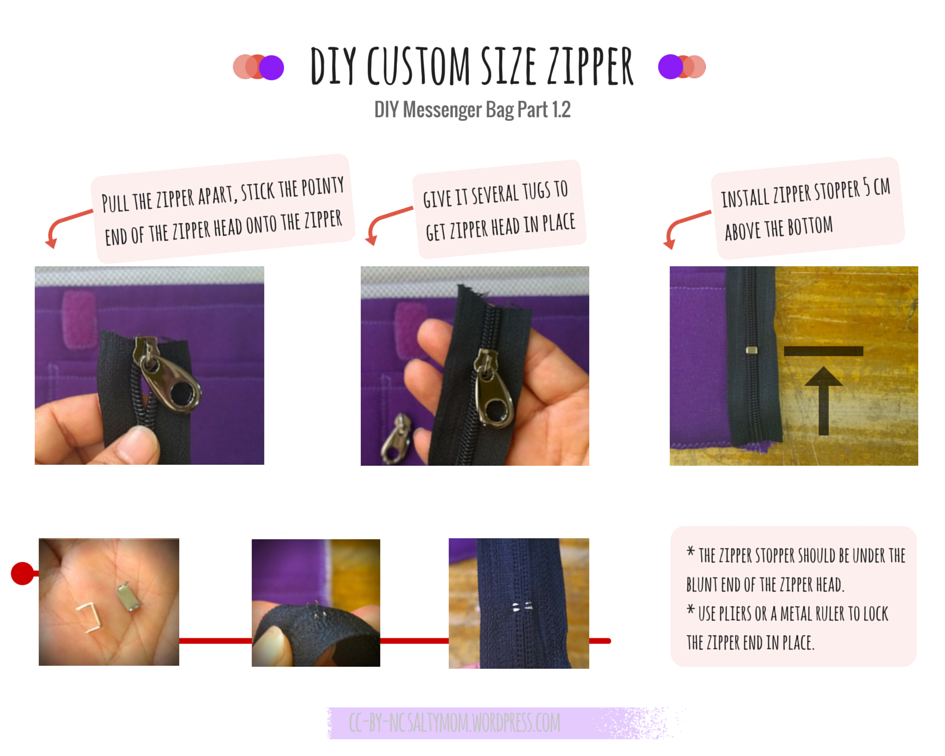
Continuing from the last post, we are now going to add two side zippers to the pocket. I’m using #5 zippers bought by the yard. #5 means the zipper teeth is 5 mm across, so that also means you’ll need matching #5 zipper heads and zipper stoppers.
First make sure the zipper end have a clean edge. Then pull the zipper apart an inch or so and insert the zipper head. Give it several tugs to slide it in. Just make sure there are no bulges or you’ll have to start over. When the zipper head’s in place, cut the zipper 5 cm longer than the pocket side. You’ll get a zipper that is closed on both ends, making it easier to bias bind the ends.
I installed the zipper stoppers 5 cm above the bottom to create a barrier, just in case the person using it forgets to zip up the pocket she won’t lose all her stuffs.
Here, you bind the top end of the zipper, and sew it onto the pocket. With that done, bias bind the bottom of the pocket.
 Now you’re ready to sew it onto the bag’s body. The canvas piece consist of the bag’s front, bottom ( 8cm ), and back. I think it is easier to fold the piece into half , then center the pocket 4-5 cm from the bottom. Leave some space on the top for sewing up the bag opening.
You can sew a X box on the zipper tab instead of a triangle, the stitching will be stronger. I did a triangle because It seems easier to fetch things from the pocket.
I use a 1 inch wide elastic band with velcro sewn on the underside as a closure. To get it into position , just stick it on the pocket and pin the other end onto the bag body. Then detach the velcro and sew a X box ( that’s a box with an X inside ) on the other end.

Next part will be on the side pockets 🙂