DIY Messenger Bag : Side Pockets with Elastic Opening ( Part 2.0 )
Sorry for taking so long, here’s the part on the side pockets. The pockets will be large enough to stick in a 600ml plastic bottle of water. You will need :
- 29 cm x 10 cm ( the side panel ) — 2 pieces from outer fabric
- 20 cm x 20 cm ( the pocket itself ) — 2 pieces from outer fabric
- 1 cm wide elastic ( if you can , use the thicker kind of elastic not those white ones )
Steps :
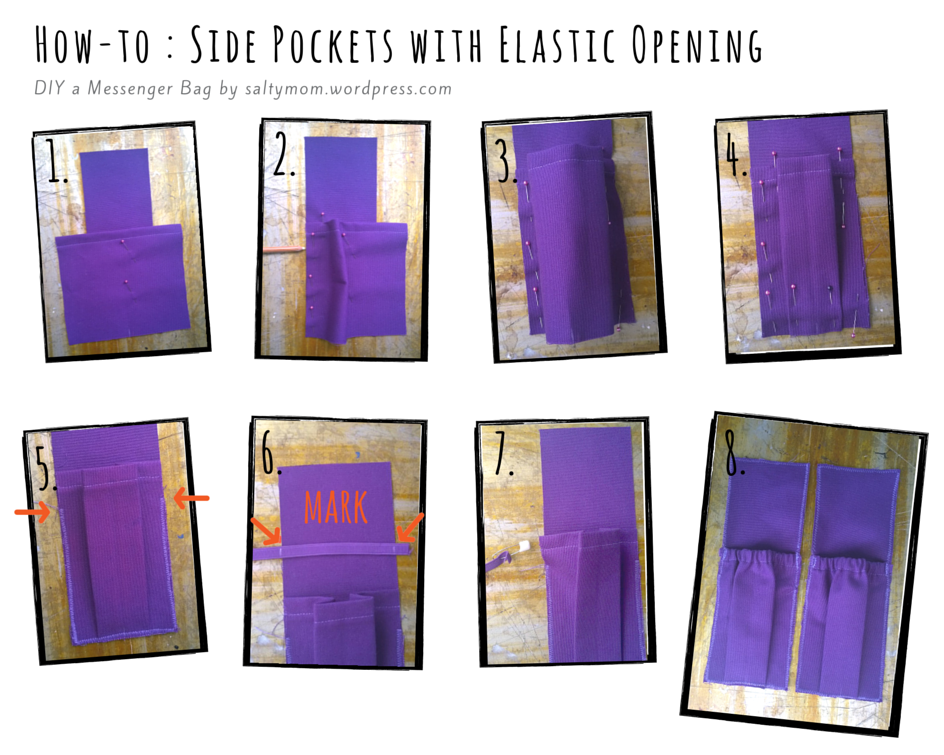
- Fold 1.3 cm over one side of the pocket panel twice to form a band large enough for the elastic to pass through. Sew in place. Center the pocket piece over the side panel piece, pin in place.
- Now, pin one side of the pocket to the side panel piece.
- Repeat on the other side. You can remove the center pins now.
- Create a box pleat by folding the sides towards the middle ( see photo ). Pin the bottom in place.
- Serge the bottom part of the pocket , leaving the band created in step 1 un-sewn.
- Take your elastic tape/band, measure and mark the width of the side panel. Don’t cut them off yet.
- Using a safety pin , thread the elastic tape/band into the slot created in step 1. When you get to second mark, sew that in place to secure. Then pull the safety pin out the other end, find the marking and sew in place. ( This wil make it easier to sew since you will be working with a longer piece of elastic.)
- Serge all around. Reinforce the sides where the elastic band are with more stitches. Water bottles are heavy !
So now there are a total of 3 pieces created in this messenger bag. 2 side pockets and one long piece with zipper pockets which makes up the messenger bag’s front/bottom/back. We will now set that aside and sew up the inner bag in the next tutorial.