DIY : Sew a Maxi Skirt in Linen for Wedding Party
The last time I made something for a wedding party must be a very long time ago. This shift dress doesn’t fit me anymore. I’ve moved on and upsized myself…( as in gained weight, not boob jobs ). I happened to score this rosy pink linen fabric at half price. 2 meters was only 139 baht ( that’s like under US4.00 ! ) On the way back from the fabric store, I also snatched up a white lace top for just 200 baht ( ~US6.00 ). Yep , I’m gonna make myself a wedding outfit for around 10 US dollars !
The pattern is from this Japanese sewing book called “Female” It’s the Feb, 1998 edition :

The skirt I’m making is the one below , except it will be in floor length. I skipped the lining cuz I already have a slip I can wear.

The only problem was the paper pattern that comes with the magazine is in size M… which I’m sure only my ego can squeeze into, but we need to eat at weddings. So I’m going to show you how I increase the size using the size M pattern as a base. So I need to use the photos as reference material… So more people will understand and buy your magazine…
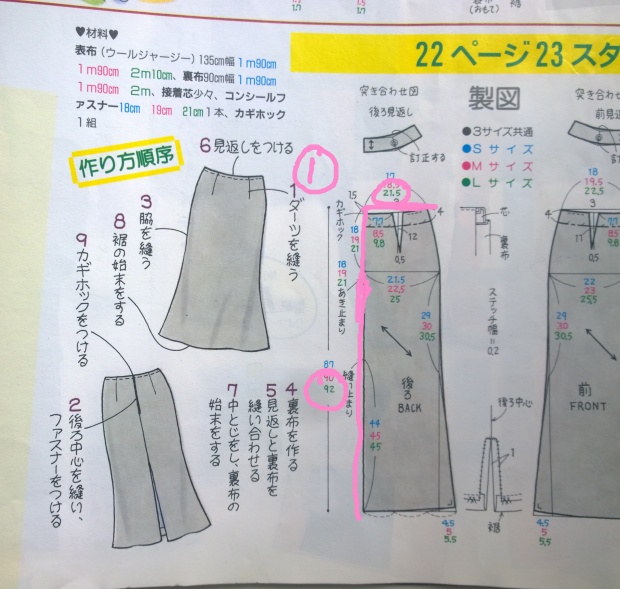
- Traced out the size M pattern on a piece of large paper but don’t cut it out yet. Get your rulers and extend the waistline to 21.5 cm and the length to 92 cm. Then create a new dart following the numbers on the waist. You’ll have to redraw the curve on the waistline.

( #2 ) Mark the distance between waist n hip. (#3) Extend to create the new hipline (#4) Extend the sides straight down so it matches the other side. (#5 ) extend the hem line by 5.5 cm . (#6) Redraw the curves on the sides and the hemline using the size M pattern as a guide. Notice that this skirt is not an A Line skirt. It flares out a tiny bit at the bottom. I also added about 15 cm to make the skirt floor length .
These patterns doesn’t come with seam allowances, so add that and then place them on the fabric in a 45 deg angle for the drape effect. I was a little short of fabric so it was probably placed on a 55 deg angle ?? Not sure, no protractor to measure.
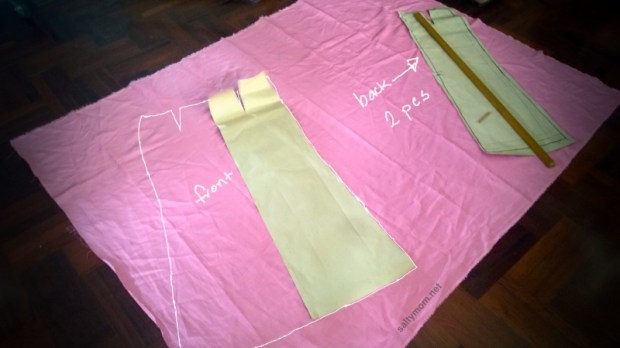
After I sewed up the darts, I place the pieces back on the fabric to cut out the waist band interfacing thingie. This is a trick I thought up so I have less work to do. Then I just “loosely” follow the step by step illustration :

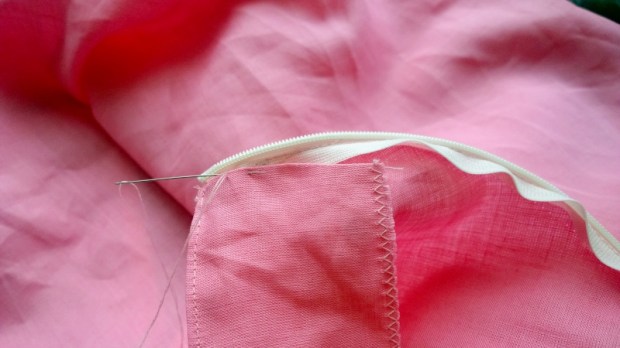
- sew together the back pieces and add zipper
- sew the sides together
- I didn’t know what no.4,5,7,9 are .. so I went on to tidy up the back slits
- sew the waistband interfacing and attach the ends to zipper, like so :
The last step is to hem the skirt. Not very complicated if you skip the lining part.
I took in the waist ( at the sides ) a bit more as it was too loose. Here’s how it looks :
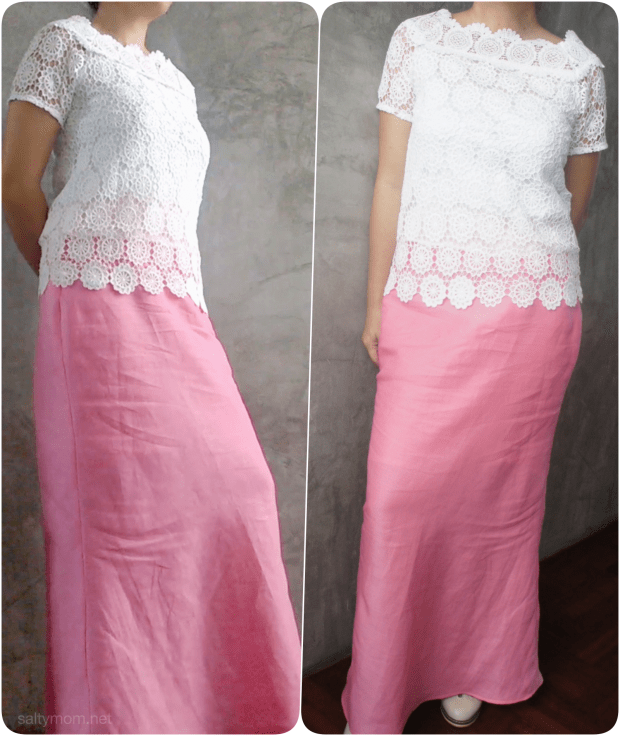
Sideview :

aannnnd back view :

Linen does get wrinkles easily. Oh , and when ironing linen , always iron on the back side or it’ll leave shiny iron marks if you iron on the top side.
I’m quite pleased that I saved a lot of money so I can buy more fabric … I mean, so I can save them for my kids’ education. XD
Please subscribe ! I blog regularly and I also have a youtube DIY channel called saltymombkk ❤ ❤ ❤ Questions , comments are welcome !


A really very pretty outfit. You look fabulous.
Thank you so much 🙂
Love a long skirt – so easy to wear and so elegant. Agree with previous comment, you do look fabulous. Gotta love those Japanese sewing and craft books. We have a Japanese bookstore inside a Japanese food market nearby and it’s always a treat to look through their craft section!
Thank you ! I can stay in Japanese book stores for hours till my kids drag me out XD
Very nice and love color combination
Thanks Anju 🙂 😊😊😊